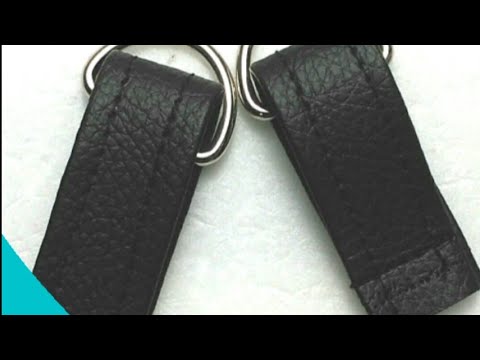
DIY BAG STRAP CONNECTORS D-ring tabs #shorts
DIY BAG STRAP CONNECTORS: How to Make Vinyl D-Ring Tabs for Your Handmade Bags
Are you tired of struggling with bag strap connectors that just don’t seem to work? Look no further! In this video, I’ll show you how to make your own DIY bag strap connectors using D-ring tabs. With just a few simple steps, you can create sturdy and stylish connectors that will elevate your handmade bags to the next level. So, let’s get started!
Why Choose DIY Bag Strap Connectors?
When it comes to making handmade bags, every detail matters. And that includes the bag strap connectors. While there are many options available in the market, DIY bag strap connectors offer several advantages:
- Customization: By making your own connectors, you have the freedom to choose the materials, colors, and designs that best complement your bag.
- Quality: DIY connectors allow you to ensure the quality of the materials used, resulting in stronger and more durable connectors.
- Cost-effective: Making your own connectors can be a more affordable option compared to purchasing pre-made connectors.
Materials Needed
Before we begin, let’s gather the materials you’ll need:
- Vinyl fabric
- D-ring
- Scissors
- Thread
- Needle
- Ruler
- Pen or fabric marker
- Iron
Step-by-Step Guide
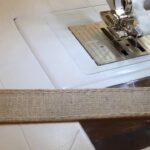
Step 1: Measure and Cut
Start by measuring and cutting the vinyl fabric into a rectangle. The size of the rectangle will depend on the width and length of your desired connector. Use a ruler and a pen or fabric marker to make precise measurements and markings.
Step 2: Fold and Iron
Next, fold the rectangle in half lengthwise, with the wrong sides facing each other. Use an iron to press the fold, creating a crisp crease.
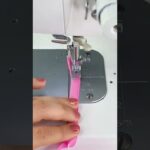
Step 3: Sew the D-Ring
Take the D-ring and position it at the folded end of the vinyl fabric, aligning it with the crease. Make sure the D-ring is centered and secure it in place with a few pins.
Using a needle and thread, sew around the D-ring, making sure to secure it firmly to the fabric. You can use a straight stitch or a zigzag stitch, depending on your preference and the level of sturdiness required.
Step 4: Sew the Sides
With the D-ring securely attached, fold the vinyl fabric in half again, this time with the right sides facing each other. Pin the sides together, ensuring that the D-ring is sandwiched between the layers of fabric.
Using a sewing machine or a needle and thread, sew along the sides, leaving a small opening at the bottom. This opening will allow you to turn the connector right side out later.
Step 5: Turn Right Side Out and Finish
Carefully turn the connector right side out through the small opening. Use a pointed object, such as a pen or a chopstick, to gently push out the corners and edges for a clean finish.
Finally, sew the small opening closed using a hidden stitch or a topstitch.
Summary
In this video, we’ve learned how to make DIY bag strap connectors using D-ring tabs. By following these simple steps, you can create customized, high-quality connectors for your handmade bags. Whether you’re a seasoned bag maker or just starting out, these DIY connectors will add a professional touch to your creations.
Don’t forget to subscribe to my channel SewlyJo for more DIY tutorials and creative bag making ideas! And if you found this video helpful, give it a thumbs up and share it with your fellow bag enthusiasts.
Tags and Keywords
#DIYbagstrapconnectors #D-ringtabs #handmadebags #bagmaking #sewingtutorial #craftingideas #DIYprojects #SewlyJo #bagmakingtips
Check the Strapping Machine Solution with Leading Manufacturer for the Professional Solution Just Here:
Related posts:
 Upgrade Your Bag Making with Hidden Strap Connectors – Must-Have DIY Sewing Tips!
 “Craft Your Own Camera Strap: Easy Sewing Tutorial for Beginners”
 “Simple Steps for Attaching a Shoulder Strap Buckle to a Backpack”
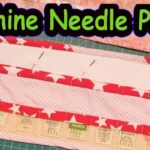 Simple Sewing Needle Storage Project: DIY Needle Pouch
 Double needle strap sewing machine with winder for upper and lower fold sewing.
 “Tote Bag with Reinforced Sewn Handle Straps”
 Simple Steps for Creating a Double Fold Strap with a Sewing Machine
 Quick Sewing Hack: #Shorts Tutorial for #DIY Enthusiasts! #Costura #SewingHacks #Crafting