How to Use A Pusher Bar Tensioner for Insulation Strapping
Welcome to our comprehensive guide on using a pusher bar tensioner for insulation strapping. In this video, we will walk you through the step-by-step process of effectively utilizing this powerful banding tool to close both aluminum and stainless steel insulation straps. Whether you are a seasoned professional or a DIY enthusiast, our pusher bar tensioner is designed to make your insulation strapping projects quick and effortless.
Overview of Our Pusher Bar Tensioner
Our pusher bar tensioner is a high-quality banding tool specifically engineered for insulation strapping applications. It features a robust construction that ensures durability and longevity, allowing you to rely on it for countless projects. The tensioner is designed to provide consistent and reliable tensioning, ensuring secure and tight straps every time.
With its ergonomic design, the pusher bar tensioner offers a comfortable grip that reduces fatigue during prolonged use. It is equipped with adjustable tension settings, allowing you to customize the tension to suit your specific strapping requirements. This versatility makes it suitable for a wide range of insulation strapping applications, from small-scale residential projects to large commercial installations.
Step-by-Step Guide: How to Use A Pusher Bar Tensioner for Insulation Strapping
1. Prepare Your Materials: Before you begin, gather all the necessary materials for your insulation strapping project. This includes the pusher bar tensioner, insulation straps, and any additional tools such as cutters or sealers.
2. Feed the Strap: Take the end of your insulation strap and feed it through the pusher bar tensioner. Make sure the strap is inserted in the correct orientation, following the instructions provided by the manufacturer.
3. Adjust the Tension: Use the tension adjustment feature on the pusher bar tensioner to set the desired tension for your insulation strap. This will depend on the specific requirements of your project, such as the type of insulation material and the level of tension needed for a secure hold.
4. Position the Strap: Once you have adjusted the tension, position the strap around the object or area you wish to secure. Ensure that the strap is properly aligned and centered for an even and balanced tension distribution.
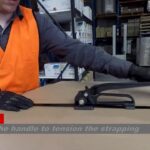
5. Apply Tension: With the strap in position, hold the pusher bar tensioner firmly and begin applying tension to the strap. Move the tensioner along the strap, gradually increasing the tension until the desired tightness is achieved. Take care not to overtighten, as this may damage the insulation material or compromise the integrity of the strap.
6. Secure the Strap: Once the desired tension is reached, secure the strap using the appropriate method, such as using a sealer or cutter. Follow the manufacturer’s instructions for the specific tool you are using, ensuring a secure and reliable closure.
Additional Tips and Considerations
• Regular Maintenance: To ensure the longevity and optimal performance of your pusher bar tensioner, it is recommended to perform regular maintenance. This includes cleaning the tool after each use, lubricating moving parts, and inspecting for any signs of wear or damage.
• Choosing the Right Supplier: When purchasing a pusher bar tensioner or any insulation strapping tools, it is important to choose a reliable and reputable supplier. Look for suppliers with a proven track record, positive customer reviews, and a wide range of high-quality products.
• Frequently Asked Questions:
1. Can the pusher bar tensioner be used with other types of strapping?
Yes, the pusher bar tensioner is designed to work with both aluminum and stainless steel insulation straps.
2. Is the tension adjustable?
Yes, the pusher bar tensioner features adjustable tension settings, allowing you to customize the tension to suit your specific strapping requirements.
3. Can the pusher bar tensioner be used for other applications besides insulation strapping?
While the pusher bar tensioner is primarily designed for insulation strapping, it can also be used for other similar banding applications where consistent and reliable tensioning is required.
Check out our informative video to learn more about how to use a pusher bar tensioner for insulation strapping. Gain valuable insights and practical tips that will help you achieve professional-quality results in your insulation projects.
Tags: pusher bar tensioner, insulation strapping, banding tool, aluminum insulation straps, stainless steel insulation straps, how to use a pusher bar tensioner, pusher bar tensioner tutorial
#pusherbar #insulationstrapping #bandingtool #aluminumstraps #stainlesssteelstraps #tutorial
Check the strapping machine solution with leading manufacturer for the professional solution just here:
Related posts:
 “Tensioning Cord Strap Using a Wire Buckle: Step-by-Step Guide”
 Using composite strapping and buckles: a step-by-step guide.
 Using a manual steel strapping tensioner: simplified guide
 Stainless Steel Banding Tool with Ratchet Tensioner – ISO T101
 How to Utilize a Banding Kit Tensioner Tool and Sealer for Pallet Packaging
 Using a Manual Plastic Strap Tensioner for Boxes and Pallets: A Guide
 Using a Friction Weld Strapping Tool: Step-by-step Guide
 How to Use a Manual Strapping Machine: Step-by-Step Guide